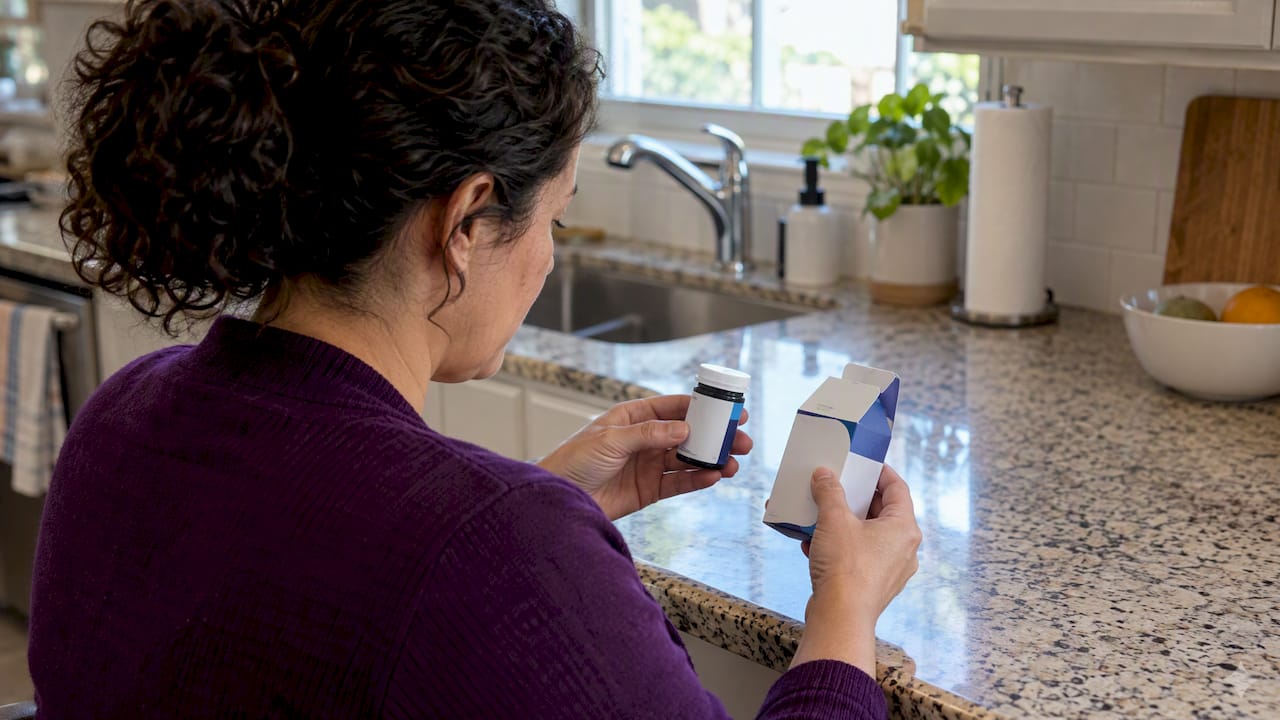
Hit the label with a hair dryer, soak it in warm baking-soda water, or rub on cooking oil to lift leftover glue. If the label does not budge, the FDA says to scratch out personal information on empty packaging, and that meets disposal guidance. Never microwave a bottle, and test any solvent on a hidden spot first.
TL;DR:
- For thick paper labels, soak the bottle in 3 to 4 cups of warm water with 4 tablespoons of baking soda for at least 20 minutes.
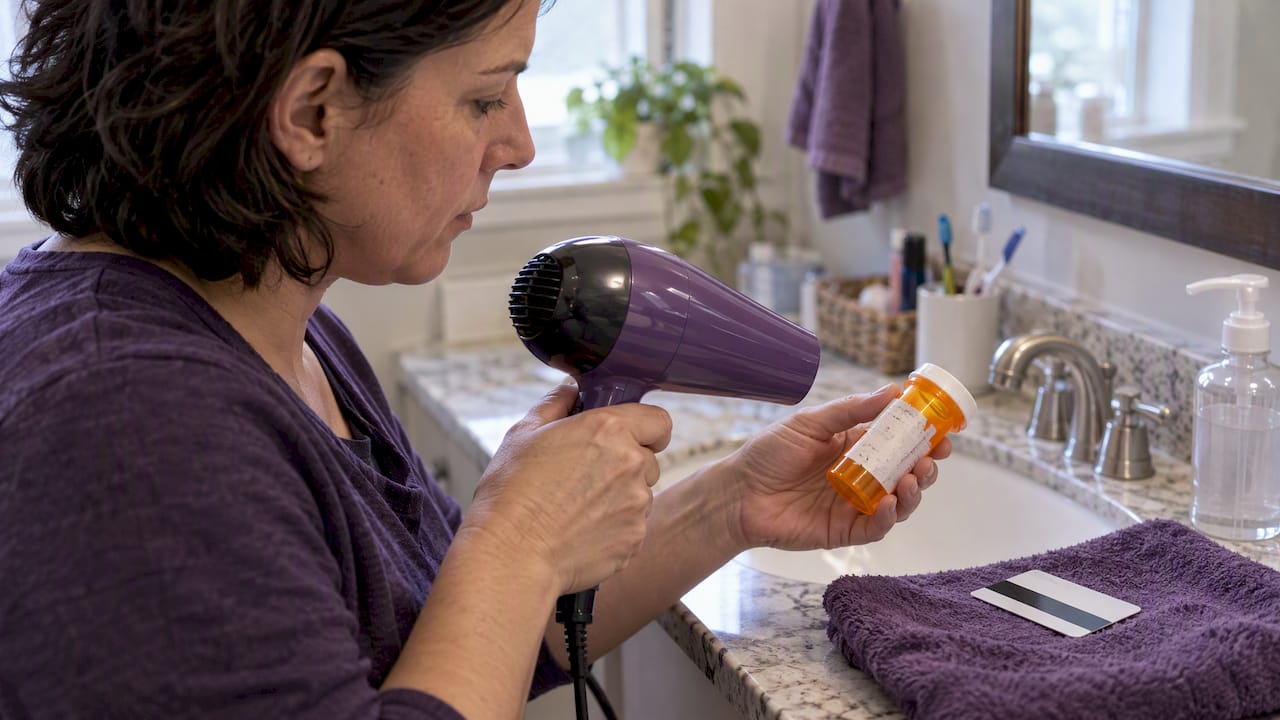
- For glossy labels, warm one section with a hair dryer for 30 to 45 seconds, then peel slowly and reheat any section that starts tearing.
- Use isopropyl alcohol at 70% or higher only for stubborn residue, apply it with a cloth, and stop if the plastic clouds or softens.
- After using oil or alcohol, wash the bottle, cap, and threads with dish soap; repeat if the surface still feels slick.
- If removal risks warping the plastic, cover personal details with permanent marker or duct tape; amber prescription vials are not recyclable in most areas.
Table of Contents
- Which method should you try first?
- How do you use a hair dryer to peel the label?
- How does the warm water and baking soda soak work?
- Can cooking oil lift sticky residue?
- When does the freezer method make sense?
- How should you use rubbing alcohol on stubborn glue?
- How do you clean and finish the bottle?
- What tools and supplies do you need?
- What do the FDA, EPA, and Poison Control say about disposal?
- What if the label still will not come off?
- What safety rules should you follow?
- Our take: heat first, privacy always
- FAQ
- Sources
Which method should you try first?
Pick the method that matches your label and your time. Most people finish faster by starting with heat and moving down the list only when needed.
- Hair dryer: best for glossy or laminated labels. Warm one section for 30–45 seconds, then peel.
- Baking-soda soak: best for thick paper labels that tear. Use 3–4 cups of warm water and 4 tablespoons of baking soda for at least 20 minutes.
- Cooking oil: best for sticky residue after the label is gone. Let it sit briefly, then wash.
- Freezer: best when you want a hands-off option. Leave the bottle in the freezer so the adhesive can turn brittle.
- Rubbing alcohol: best as a final cleanup for stubborn glue. Test the plastic first.
- Privacy-only fix: a permanent marker, duct tape, or scratching works when full removal is not practical.
Methods stack well. A common sequence is heat, then oil on what is left, then dish soap to finish. If you only need to protect your information, you can skip peeling altogether and go straight to the privacy option covered later in this article.
One more thing before you start: a clean bottle is not always a recyclable bottle. We explain why further down, so you do not spend twenty minutes scrubbing for no reason.
How do you use a hair dryer to peel the label?
Heat is the quickest route for most plastic prescription bottles. Warmth softens the adhesive so the label releases instead of tearing into paper scraps. The method below follows the household approach described in this wikiHow label-removal guide.
- Lift one corner of the label with your fingernail or a plastic card.
- Aim a hair dryer on high at that area, holding the bottle by the opposite end so your fingers stay away from the hot spot.
- Peel slowly with steady pressure, pulling in the direction the label wants to go.
- Reheat the next section as you move along, rather than yanking a cold stretch of label.
- Rub off any glue left behind with your thumb or a soft cloth.
Slow peeling is what separates a clean result from a shredded one. If the label starts to tear, stop pulling and heat the area again. Paper that has not warmed enough will split along the fibers and leave a thin, stubborn layer stuck to the plastic.
A few safety notes. Thin plastics can soften and warp if you hold the dryer too close or too long, so keep it moving and keep a few inches of distance. Use a plastic card or the edge of a spatula rather than a metal knife, since metal scratches the bottle and can leave marks that trap more glue later.
Pro Tip: Heat the bottle, not just the label. A few extra seconds on the surrounding plastic helps the whole sticker release in one piece.
How does the warm water and baking soda soak work?
Soaking is the reliable choice for thick paper labels, or whenever you worry that heat could warp the bottle. It uses things you already have in the kitchen and needs no harsh chemicals.
- Fill a bowl or sink with 3–4 cups of warm water, not boiling.
- Stir in 4 tablespoons of baking soda until it dissolves.
- Submerge the bottle for at least 20 minutes, as the how-to guidance we reviewed recommends.
- Lift the bottle out and scrape the softened paper with a fingernail or plastic card.
- Make a paste from baking soda and dish soap, then rub it on any glue that remains.
- Rinse with warm water and dry the bottle.
Keep the label under the surface the whole time. If the bottle floats, set a small plate or a clean mug on top, or fill the bottle partway with water so it sinks. Dry paper above the waterline will not soften, and you will end up with a label that peels in strips.
Soaking has one more advantage: it loosens the paper without making you work for it. While the bottle sits, you can wash your hands, gather your supplies, or start on another bottle. Many people find that the label slides off in one sheet once the paper is fully saturated.
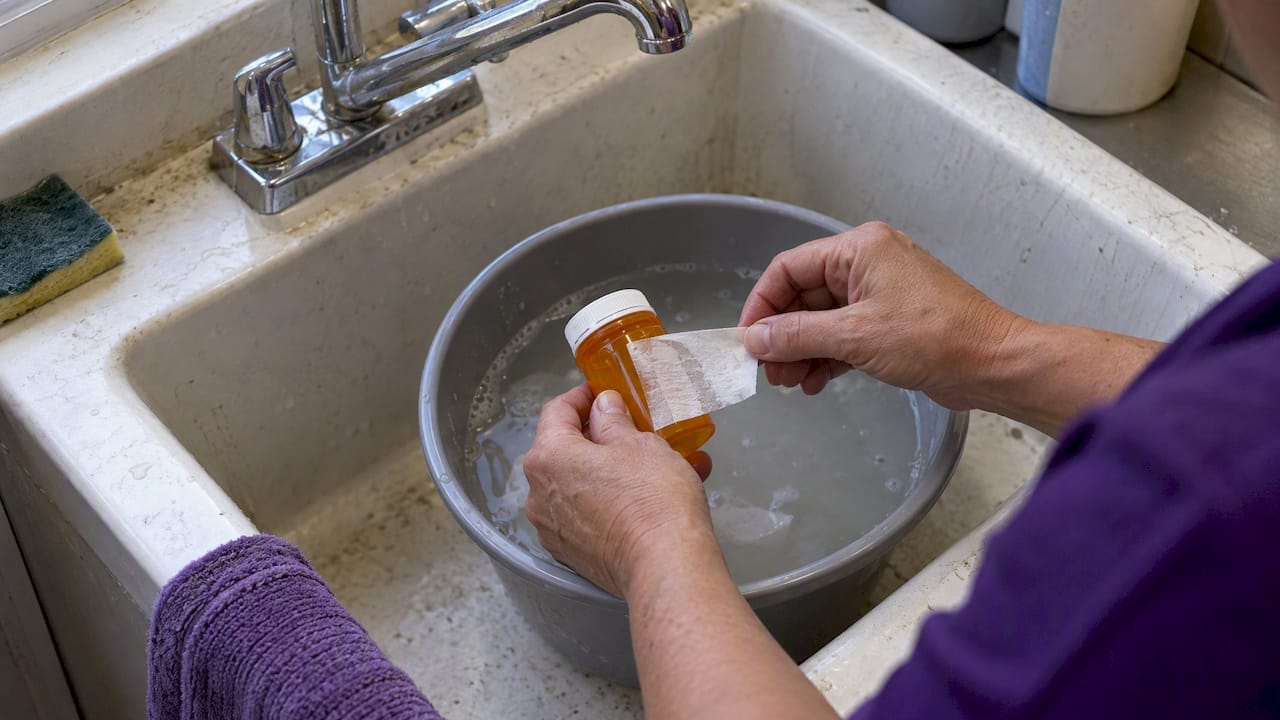
Choose the soak over heat when the label is thick and fibrous, when you do not own a hair dryer, or when the plastic feels thin. The trade-off is time, since you have to wait for the soak to work. After the label is off, a quick scrub with the paste handles whatever the water could not dissolve.
Can cooking oil lift sticky residue?
Yes, and it is one of the simplest fixes for the tacky patch that stays behind after the paper is gone. Oil works its way into the adhesive and weakens its grip, which is why Poison Control suggests a small amount of oil first for stubborn sticky residue.
Here is how to use it:
- Pour a little olive or vegetable oil onto a paper towel or cloth.
- Dab it over the sticky area until the glue is fully covered.
- Let it sit briefly so the oil can soften the adhesive.
- Rub the spot with the cloth or your thumb. The glue should roll into small balls and wipe away.
- Wash the bottle with dish soap and warm water to remove the grease, and repeat if a film remains.
You only need a thin coating. Pouring on too much just makes more mess to clean up afterward, and it does not speed anything up. If the residue is thick, reapply and wait another few minutes instead of scrubbing hard.
One compatibility note: skip the oil if you plan to reuse the bottle for something where grease would be a problem, or if any medicine or contents are still inside. Oil can seep into threads and caps, and it takes a few rounds of soapy water to get out completely. When you want a spotless result, treat the washing step as part of the method, not an afterthought.
When does the freezer method make sense?
Freezing is the low-effort option. Cold makes many adhesives brittle, so the label cracks and flakes instead of stretching and smearing. It suits labels you would rather not heat, and it asks almost nothing of you besides patience.
- Empty and dry the bottle, then place it in the freezer for 3–5 hours, or leave it overnight.
- Take it out and start at a corner right away, before the plastic warms back up.
- Peel or flake the label off in pieces. The glue often breaks away along with it.
- Scrub lightly with a damp cloth if a dusty residue stays behind.
- Follow up with oil or soapy water if any sticky patch remains once the bottle returns to room temperature.
Work fast once the bottle comes out. The adhesive softens again as the plastic warms, so a bottle you leave sitting on the counter for ten minutes may behave like it never went in.
The limits are worth knowing. Freezing does not work on every adhesive, and some labels stay stubbornly attached no matter how cold they get. You may also still need a cleanup pass afterward. Think of it as a strong first step that sometimes finishes the job alone and sometimes just makes the next method easier.
How should you use rubbing alcohol on stubborn glue?
Rubbing alcohol is a good last step when other methods leave a stubborn film. Use it on a cloth, never poured directly over the bottle, and keep it mild.
- Dampen a cloth or paper towel with isopropyl alcohol at 70% or higher.
- Rub the residue gently in small circles until it lifts.
- Open a window or work near fresh air, and wear disposable gloves.
- Test on a hidden spot first, such as the bottom of the bottle, because plastic formulations and printed markings vary.
- Stay away from acetone and nail-polish remover, which can cloud or warp plastic.
- Skip abrasive scrapers and rough scouring pads that scratch the surface.
Printed markings on the bottle, such as the cap warning or a volume mark, can fade under solvents. If the test spot looks cloudy, sticky, or soft, stop and choose a gentler approach like oil or a baking-soda paste.
Prescription bottle plastics generally do better with milder solvents, so reach for alcohol only after the gentler methods have done most of the work. A small amount goes a long way. If a patch of glue still will not budge after a couple of passes, more rubbing rarely helps; switching methods does.
Pro Tip: Try a drop of oil first and alcohol second. The oil softens the glue, and the alcohol then cuts through what remains with far less rubbing.
How do you clean and finish the bottle?
Once the label and glue are gone, the last job is removing every trace of oil or solvent so the bottle is not slippery or smelly. A greasy bottle is also harder to handle safely.
- Squirt a little dish soap on a damp sponge and scrub the whole surface, including the cap and threads.
- Rinse under warm running water until the suds disappear.
- Make a baking-soda and dish-soap paste for any spot that still feels tacky, and scrub it with a soft cloth.
- Rinse again, then check by running a dry finger across the plastic. If it drags or feels slick, wash once more.
- Dry the bottle completely with a clean towel or let it air-dry upside down.
Pay attention to the cap. Residue likes to hide in the ridges, and a quick pass with an old toothbrush clears it out. A fully dry bottle also keeps fresh stickers or tape from peeling off later if you plan to reuse it.
If full removal starts to risk damaging the bottle, change your goal. EPA guidance says you can protect your personal information by removing the label or making it unreadable, and it lists permanent marker, duct tape, and scratching as options. Finishing the privacy step beats ruining the plastic for a spotless look.
What tools and supplies do you need?
Gather everything before you begin so you are not hunting through cabinets with a wet bottle in hand. Most of this is already in your kitchen or bathroom.
- A hair dryer
- A plastic card or small plastic spatula
- Your fingernail or a pair of tweezers for lifting corners
- A bowl or sink for warm water
- Baking soda
- Dish soap
- Cooking oil, such as olive or vegetable oil
- Isopropyl alcohol at 70% or higher
- Soft cloths, paper towels, or a sponge
- Disposable gloves
- A permanent marker or duct tape for the privacy fallback
Commercial adhesive removers are optional. If you choose one, test it on a hidden spot first, since formulas differ and some can damage plastic. Plan for ventilation too. Opening a window takes seconds and makes solvents far more pleasant to use. Having gloves on hand keeps oils and alcohol off your skin, and a few paper towels save you from reaching for a dripping hand towel mid-task.
What do the FDA, EPA, and Poison Control say about disposal?
Label removal is mainly a privacy step, and the official guidance is more flexible than most people expect. You do not need a perfectly clean bottle to throw it out safely.
- FDA: before trashing or recycling an empty medicine bottle, scratch out all personal information on the label. Take-back programs are the preferred route for leftover medicine when one is available near you.
- Household disposal with no take-back option: the FDA says to remove the medicine from its original container, mix it with an undesirable substance such as used coffee grounds, dirt, or cat litter, seal it in a bag or container, and discard it. Do not crush tablets or capsules, and do not flush medicine unless it is on the FDA flush list. The agency also explains how to dispose of non-flush-list medicine in the trash.
- EPA: you may remove the label or make it unreadable with permanent marker, duct tape, or scratching. The agency also notes that amber #5 prescription vials are not recyclable in most areas of the country, so a clean bottle does not guarantee a spot in the recycling bin. Check your local rules.
- Poison Control: destroy medication labels that carry personal information, and use pharmacy take-back options when available. Its guidance separates two risks: someone accessing the medicine, and someone reading your health details off the packaging. Handle the medicine first, then the label.
Taken together, the message is simple. If peeling is easy, peel. If it turns into a fight, obscure your name, prescription number, and pharmacy details and move on.
What if the label still will not come off?
Do not escalate forever. A short decision path keeps you from damaging the bottle or creating a safety problem.
- Move through the methods in order: heat, then soak, then oil, then alcohol. Each one handles a different kind of stubborn spot.
- Stop right away if the plastic warps, turns cloudy, or the printing starts to dissolve.
- If the label still resists, cover or scratch out your name, address, prescription number, and pharmacy details with a permanent marker or duct tape, as EPA and FDA both allow.
- Consider a medicine take-back location or the FDA household-trash steps instead of more aggressive scrubbing.
- Dispose of the bottle according to your local rules once your information is unreadable.
Knowing when to quit saves time and plastic. A bottle with a blacked-out label is just as private as a spotless one, and the guidance supports that choice without any fuss.
What safety rules should you follow?
A few ground rules keep the job low-risk. None of them take extra time, and all of them prevent common mistakes.
- Do not microwave a prescription bottle or pour boiling water into it. Plastic can warp, and the label can smear instead of release.
- Ventilate your workspace and wear gloves whenever you use rubbing alcohol or any solvent.
- Test every solvent on a hidden spot before treating the whole bottle.
- Keep tools plastic, not metal, so you do not gouge the surface.
- Never reuse an unlabeled bottle for chemicals, cleaners, or food. Poison Control warns that an unlabeled container can leave emergency staff without ingredient information if someone swallows what is inside.
- Keep empty bottles and cleaning supplies away from children and pets while you work.
If anything about a step feels risky, skip it and use the privacy fallback instead.
Our take: heat first, privacy always
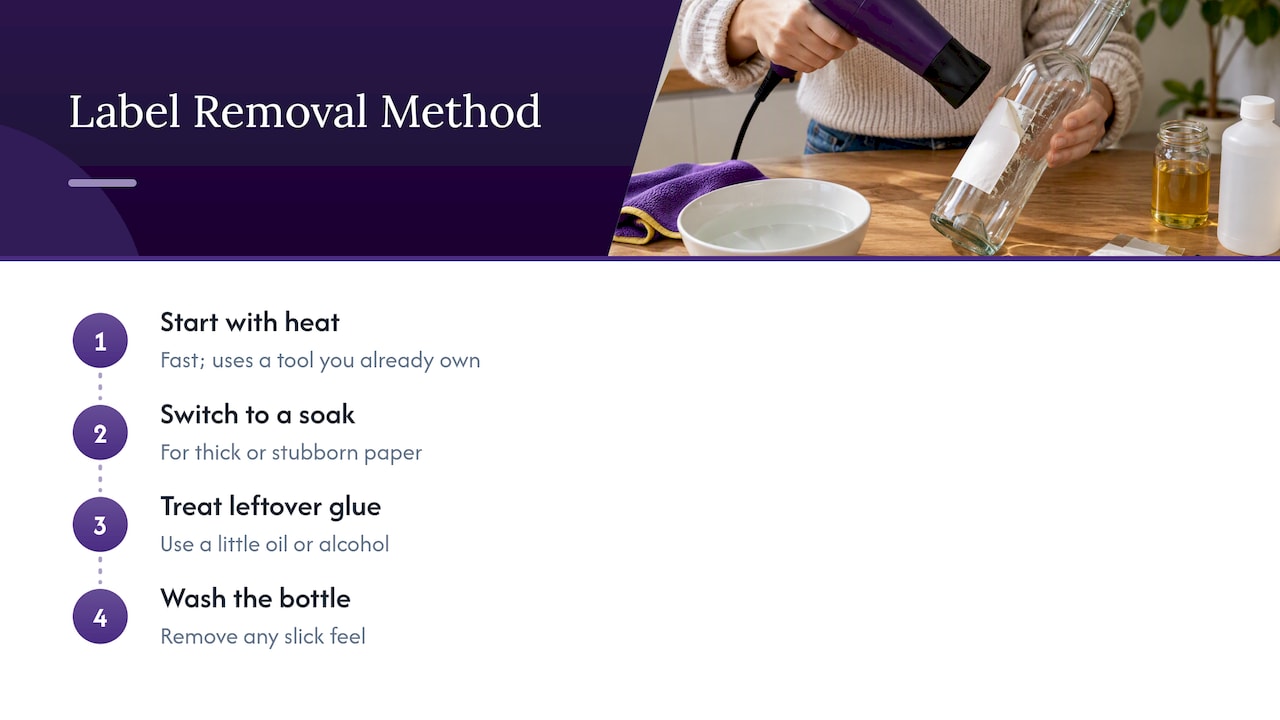
I keep this simple. Start with heat because it is fast and uses a tool you already own. Move to a soak when the paper is thick or stubborn, and finish any leftover glue with a dab of oil or a wipe of alcohol. Then wash the bottle well so nothing feels slick.
What I would stress most is that the label is about your privacy, not about a perfect bottle. When scrubbing starts to threaten the plastic, scratching out or covering your details does the job and matches what the FDA and EPA describe. Nobody gets extra credit for a flawless finish.
If you are unsure what to do with leftover medicine, ask your pharmacy or look for a local take-back option before you toss anything in the trash. It takes a few minutes and keeps everyone in your home safer.
If you also have sealed, unused diabetic supplies sitting around, we can help with that side of the cleanup. See our guide on how to manage overstock diabetes medications safely, or get cash for unused diabetic supplies in Orlando.
— Liliana
FAQ
What is a good tool for removing prescription bottle labels?
A plastic card or small plastic spatula is the best all-around tool. It lifts corners and scrapes softened paper without scratching the bottle the way metal can. Pair it with a hair dryer for the fastest results.
Should you remove labels from prescription bottles before recycling?
You should at least make the personal information unreadable. The FDA says to scratch out personal information before trashing or recycling an empty bottle. Keep in mind that amber prescription vials are not recyclable in most areas, so check your local program first.
What is the hack for removing sticky labels?
Heat the label with a hair dryer, peel slowly, and rub any leftover glue with a little cooking oil. Wash the bottle with dish soap afterward to remove the grease. For paper labels that tear, a warm baking-soda soak works well.
How do I get rid of labels without peeling them?
You do not have to peel at all. Cover your name and prescription details with permanent marker or duct tape, or scratch them off. EPA guidance lists these as acceptable ways to protect your information.
Sources
- How to Remove Labels from a Plastic Prescription Bottle
- Where and How to Dispose of Unused Medicines | FDA
- What To Do with Unwanted Household Medicines | US EPA
- Expired medicines: Should you take them? | Poison Control